Measurement Procedure
| Required Tools | |||
| Tool | Part Number | Part Description | Qty |
| A | 198-9142 | Plastic Gauge (Green) 0.025 to 0.076 mm (0.001 to 0.003 inch) |
1 |
| 198-9143 | Plastic Gauge (Red) 0.051 to 0.152 mm (0.002 to 0.006 inch) |
1 | |
| 198-9144 | Plastic Gauge (Blue) 0.102 to 0.229 mm (0.004 to 0.009 inch) |
1 | |
| 198-9145 | Plastic Gauge (Yellow) 0.230 to 0.510 mm (0.009 to 0.020 inch) |
1 | |
Note: Plastic gauge may not be necessary when the engine is in the chassis.
Note: Cat does not recommend the checking of the actual bearing clearances particularly on small engines. This is because of the possibility of obtaining inaccurate results and the possibility of damaging the bearing or the journal surfaces. Each Cat engine bearing is quality checked for specific wall thickness.
Note: The measurements should be within specifications and the correct bearings should be used. If the crankshaft journals and the bores for the block and the rods were measured during disassembly, no further checks are necessary. However, if the technician still wants to measure the bearing clearances, Tooling (A) is an acceptable method. Tooling (A) is less accurate on journals with small diameters if clearances are less than 0.10 mm (0.004 inch).
The technician must be very careful to use Tooling (A) correctly. The following points must be remembered:
•Ensure that the backs of the bearings and the bores are clean and dry.
•Ensure that the bearing locking tabs are properly seated in the tab grooves.
•The crankshaft must be free of oil at the contact points of Tooling (A) .
1.Put a piece of Tooling (A) on the crown of the bearing that is in the cap.
Note: Do not allow Tooling (A) to extend over the edge of the bearing.
2.Use the correct torque-turn specifications in order to install the bearing cap. Do not use an impact wrench. Be careful not to dislodge the bearing when the cap is installed.
Note: Do not turn the crankshaft when Tooling (A) is installed.
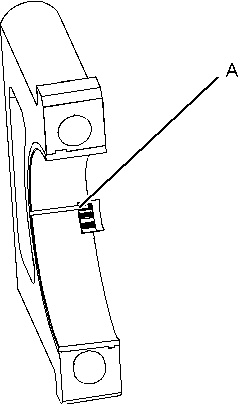
3.Carefully remove the cap, but do not remove Tooling (A) . Measure the width of Tooling (A) while Tooling (A) is in the bearing cap or on the crankshaft journal. Refer to Illustration 1.

4.Remove all of Tooling (A) before you install the bearing cap.
Note: When Tooling (A) is used, the readings can sometimes be unclear. For example, all parts of Tooling (A) are not the same width. Measure the major width in order to ensure that the parts are within the specification range. Refer to Specifications Manual, “Connecting Rod Bearing Journal” and Specifications Manual, “Main Bearing Journal” for the correct clearances.